Next you will remove 8 screws from the bottom of the DSS-1, all under the area of
the DSS-1 disk drive. I positioned my DSS-1 with the disk drive area overhanging
the edge of the table so I could easily get to the screws on the bottom. I have placed
a white dot next to the 8 screws that you will be removing. Notice that the not all of the
small screws are the same. Take note so you can return them to the correct position.

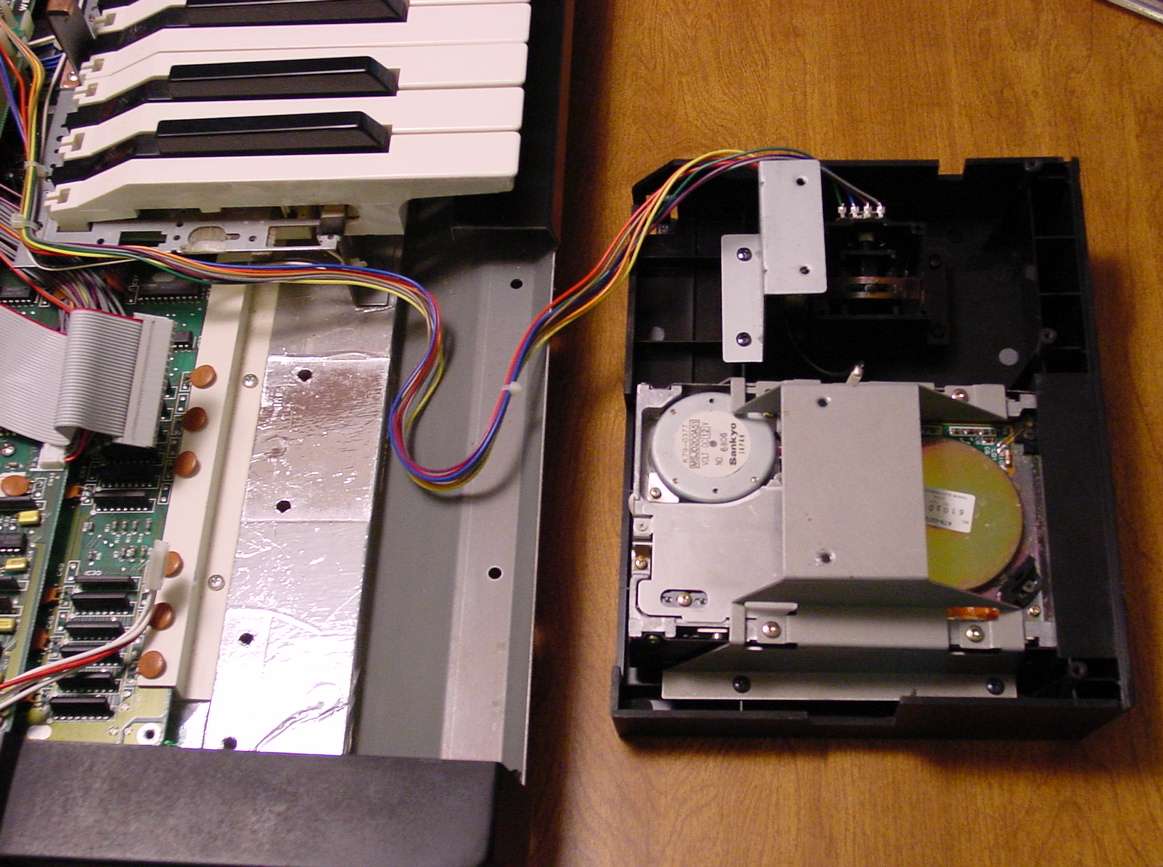
Once these 8 screws are removed and the lid is hinged back open, the disk drive
bay will be completely free of the main chassis and can be easily removed.

Take particular notice of the connection of the ribbon cable. The position of the
cable on the back of the new drive is slightly different, so we want to be sure we
hook it back up correctly. Disconnect the power cable and ribbon cable. Then,
the drive assembly can be removed from the DSS-1 chassis, but will remain
connected by the wiring to the Joystick.