Korg DSM-1 disk drive replacement instructions – Page 1 of 4

The following instructions will guide you step by step (with photos) through the process of
replacing the disk drive in your Korg DSM-1 rack mount sampling synthesizer. These instructions
and photographs are the copyrighted property of Larry Hendry. They are designed for your
personal use. These may not be reproduced or redistributed in any fashion without my permission.
You may link to them from other Korg DSS-1 or DSM-1 related web sites. Proper credit is absolutely
expected. You may not copy this material to any other website without my written permission. I assume
no liability for damage you may cause to your DSM-1 while attempting to replace the disk drive. The
task is relatively easy, but assumes some degree of mechanical aptitude. So, proceed at your own risk.

Now that the disclaimers are out of the way, let’s get started. The first step is very important to protect
yourself and your equipment. Be certain that your Korg DSM-1 is disconnected from the AC power
source and that all other connecting cables have been disconnected. You should plan to do this work
in a clear work area and have a small container or bag of some nature to retain the screws for re-
assembly. The only two tools needed are a Phillips head screwdriver and pair of needle-nose pliers.


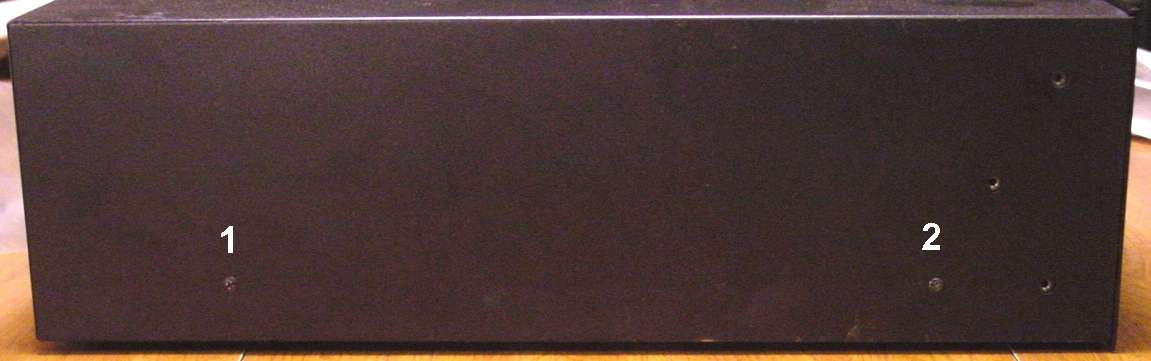
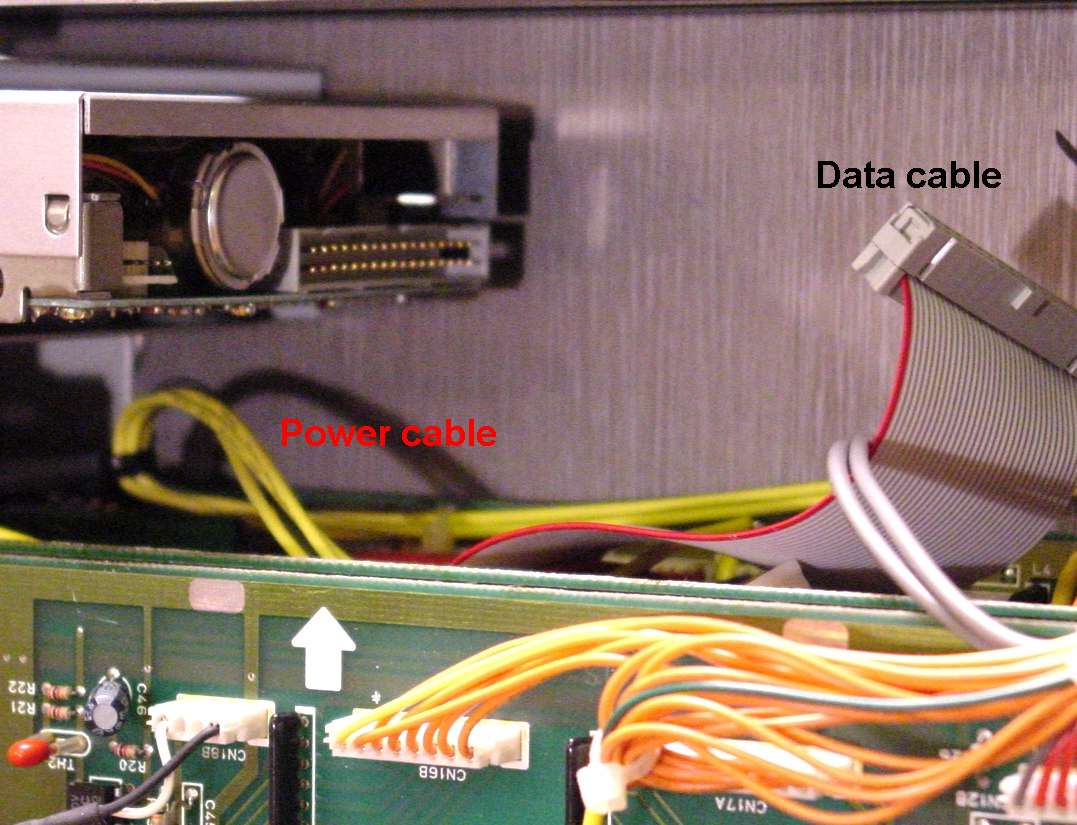
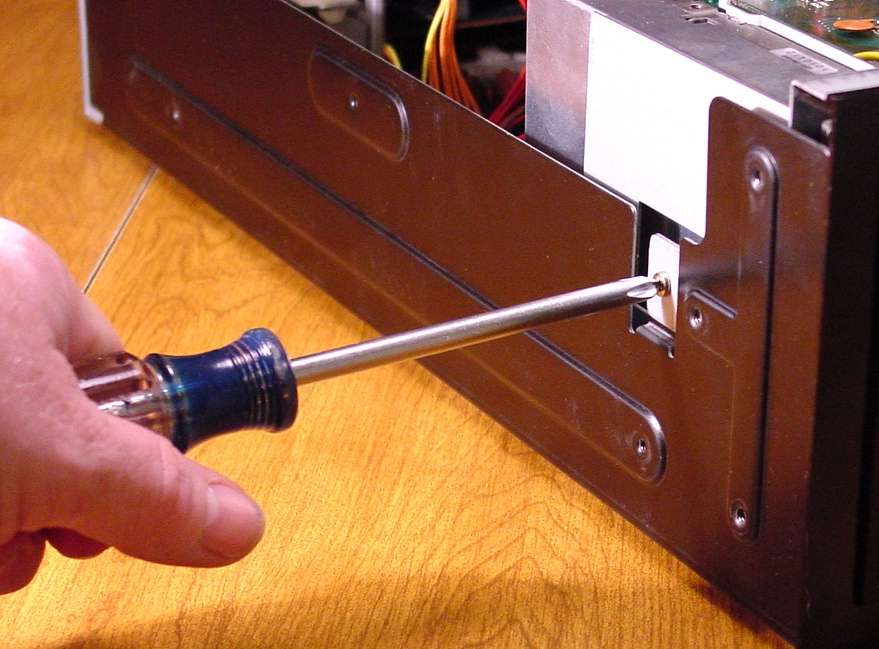
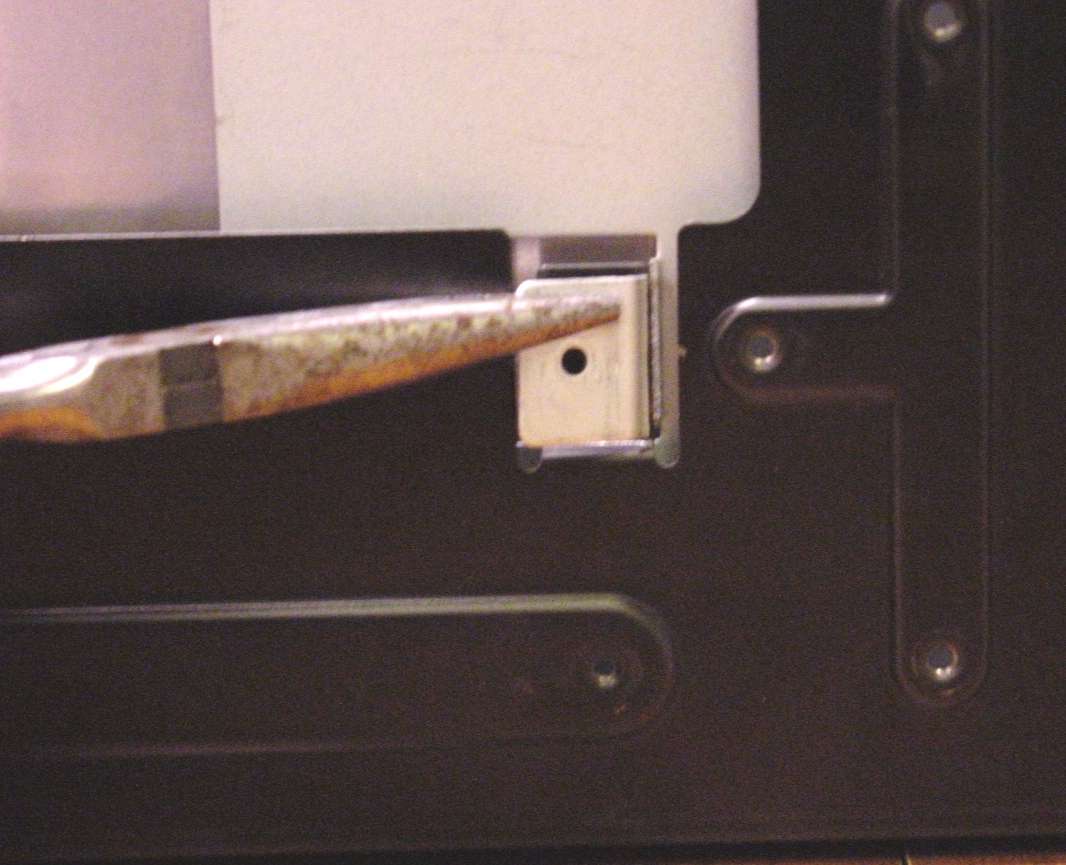
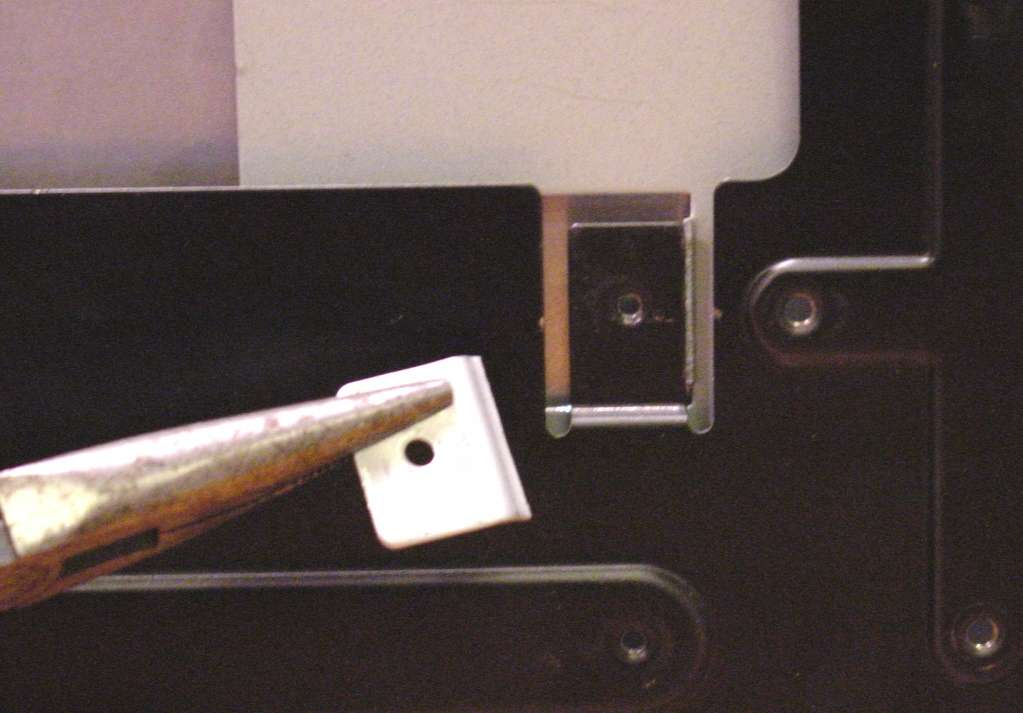
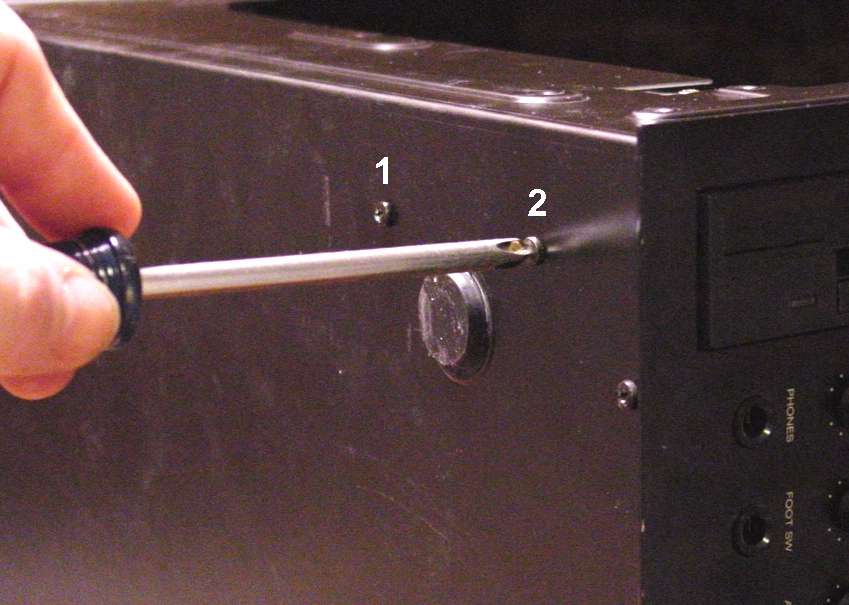
The first step in the disassembly process is to remove the rack ears from both sides of the DSM-1. The photo to the right shows that 3 screws hold each of the rack ears onto the side of the DSM-1. These screws are different than all the other screws you will remove in the disassembly. They are metric, so be careful not to lose them.


The next step is to remove the top cover of the DSM-1 There are 10 screws that hold the cover in place. You will find 2 on each side, 3 across the top near the front edge and 3 on the back. See the three photos detaining which screws to remove.

Once the top is removed, the disk drive will be exposed. Disconnect both the power cable and data cable from the back of the disk drive. Note the orientation of both. They will go back on the new drive the same way. Tuck them out of the way for now.

There are six screws that hold the disk drive in place. While they can be removed in any order, I am recommending that you follow my suggested order from removal and replacement and benefit from my experience. When the new drive is installed, it will be secured with only 5 screws. More on that later. First, remove the single screw on the left side of the DSM-1 that holds the drive mounting bracket to the side of the DSM-1.

It is clear to me that the disk drive was one of the first components installed in the
DSM-1 chassis. However, you don’t want to remove the main PCBs just to get the drive out. So, you will need to break the tab off of the mounting bracket where you just removed the side screw. Unless you do this, you will NOT be able to remove your
DSM-1 disk drive without removing most of the electronics from your unit. Trust me, this is the easiest way. The tab is not difficult to break off. Grab hold of it with a pair of pliers and work it back and forth at the bend. It will snap off cleanly after bending back and forth 10 to 15 times.


Flip the DSM-1 up on its side (with the disk drive side to the top). Remove the two screws from the bottom as shown in the photo to the right. These hold the drive bracket to the bottom.


Back to DSS-1 / DSM-1 main page . . Ahead to instructions page 2