I was inspired by Larry Hendry’s Synthesizers.com cabinet page
These photos show the first of two Synthesizer's dot com QCS22 22-Space Walnut Studio Cabinets I am converting to
hold MOTM modules. See the dot com site for details and ordering:
http://www.synthesizers.com/cabinets.html
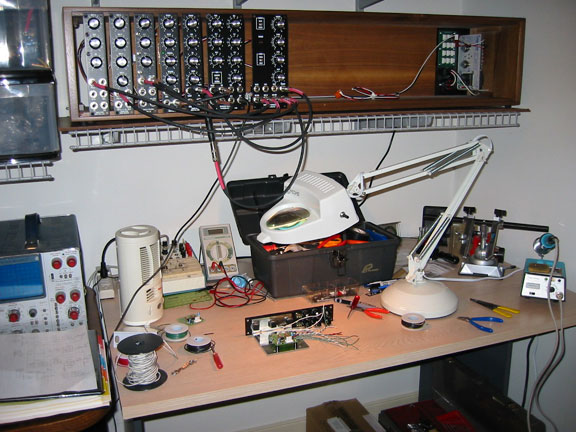
The mounting rails available from Larry Hendry make it all possible. The first photo shows my workbench, above which is
the cabinet. This is how it looked before adding the mounting rails. I temporarily mounted some modules using the wood
screws supplied with the dot com cabinet.
Click here for a larger image.
Note the position of the MOTM-900 power supply, which is located to the right side of the cabinet in this photo. That's
the opposite end from where the dot com power supply goes. The back of the cabinet is shorter than the full width to
allow for the power supply. I removed the back, slid it over just the width of the MOTM-900, and refastened it. I
mounted MOTM-900 with wood screws. Also note that the power distribution board of the MOTM-900 faces to the
left, where it is within convenient reach of the modules. The MOTM-900 is also positioned in a normal upright position,
from the rear. It you tried to mount it on the other end it would wind up upside down, or the distribution board would be
hidden behind the power supply chassis from the module area. Of course you don't have to use the MOTM-900 supply,
but if you do, I recommend mounting it this way. By the way, there is a MOTM-960 power distribution board mounted
just behind those modules. You can see the wire going to it from the MOTM-900.
Here's how it looks with the Stooge rails:

Click here for a larger image.
Here's another image:
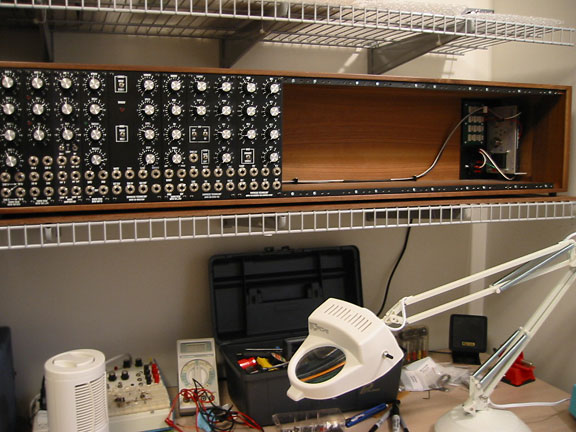
Click here for a larger image:
It is not a simple job to mount the rails. I am not a great carpenter. The wooden lip that you have to screw the rails to is
narrow, plus the rails cannot be mounted flush with the edge of the cabinet. They have to be spaced inward just a tad
(about two credit card widths, I found) so that the MOTM mounting holes will align properly in the vertical dimension.
I had some blank MOTM panels and used them as spacing guides by fastening them to the rails during the mounting
process. It's tricky, because there is not much wood at the edge of the lip for the screws to bite. The screws are #4 x ¾
inch flat head wood screws. I always drill a pilot hole to prevent splitting the wood. Here, the hole needs to be drilled
perpendicular to the panel. Do not be tempted to drill at an angle. I did that at first. It makes it harder to keep the spacing
right, because tightening the screw will pull the rail outward.
Another tip: Start at the left and leave space for the filler end cap. Then measure along and mark where the mounting
screws will go, following the 1 3/4" - 3 1/2" pattern on the rails. I don't recommend just butting the rails together end to
end and hoping for the best. You want the MOTM mounting holes to align correctly all the way across, so that you can
even mount a module across the joint of two rails. There is a gap of almost 1/8" where the cut rail is used. And I had to
file off the end of one of the full rails to make it short enough to come up even. But they were pretty close to start with. As
for the gap at the left, I put the 1/2" spacer piece from Larry in there before I fastened down the first rails, and it turned
out that the rails wedged it in place so that it needed no further fastening. I don't yet have the MOTM logo 3/4" end cap
for the right end, but the gap there is really close to 3/4". Since I started working from the left, my logo end cap will be on
the right end, which is opposite from the cabinet shown on Larry's page.
If you're considering this project, and have questions, you can email me at
Richard Brewster
November 19, 2002